Quick commerce is no longer the future — it is the present. With over 40% market share and deliveries in under 10 minutes, Blinkit has fundamentally changed how India shops. If your brand is not on Blinkit in 2026, you are handing daily sales to competitors who are. This guide walks you through every step of the Blinkit seller onboarding process — so you go live faster, avoid costly rejections, and start generating consistent revenue from India’s #1 quick commerce platform.
Whether you are a D2C brand scaling into quick commerce, an FMCG manufacturer looking for new distribution channels, or a distributor wanting to tap into Blinkit’s hyperlocal network — this guide is built for you. We cover the exact process, required documents, approval timelines, common mistakes, and how professional onboarding support can cut your go-live time dramatically.
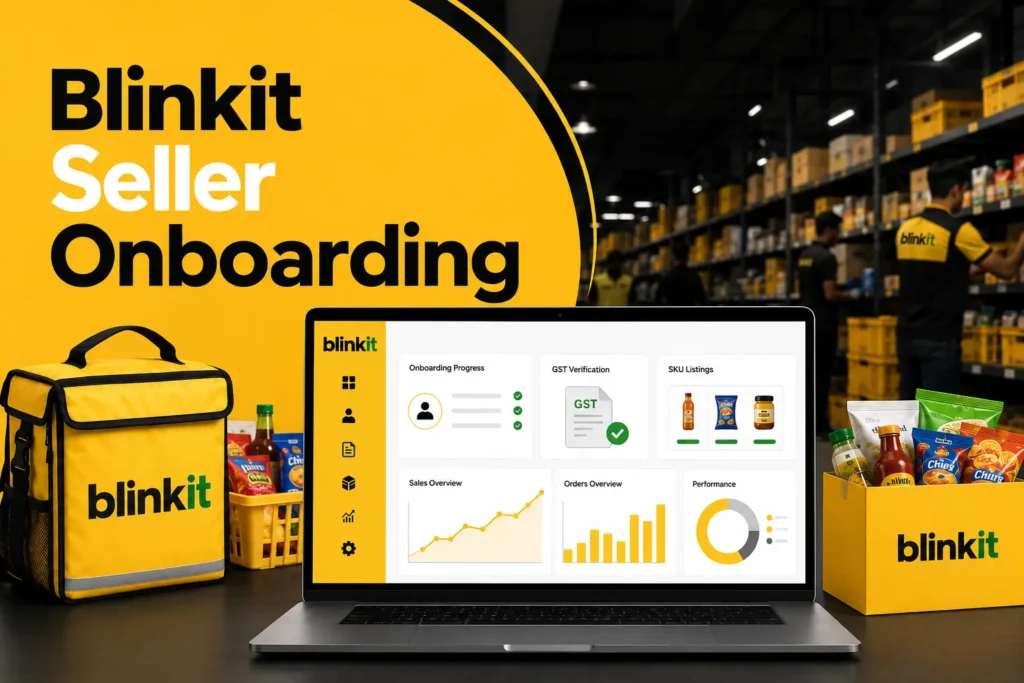
What is Blinkit and Why Should Your Brand Be On It?
Blinkit (formerly Grofers) is India’s leading quick commerce platform — delivering groceries, FMCG products, personal care items, household essentials, and more in under 10 minutes through a network of hyperlocal dark stores. It operates across 25+ major Indian cities with 1,000+ dark stores and serves 20–30 million monthly active users.
Unlike traditional e-commerce where customers wait 1–3 days, Blinkit captures high-intent, immediate-need buyers — people who want a product right now. This creates a fundamentally different and more valuable customer interaction for brands.
🚀
D2C Brands
Direct-to-consumer brands that want to reach urban, high-intent buyers without managing last-mile logistics. Blinkit handles delivery; you supply inventory to dark stores.
🏭
FMCG Manufacturers
Packaged food, beverages, personal care, and home care brands looking for a high-volume, repeat-purchase digital channel beyond modern trade.
📦
Distributors & Wholesalers
Those with the capacity to supply high-demand goods consistently to Blinkit’s dark store network across multiple city clusters.
🏪
Local Retailers
Kirana stores, pharmacies, bakeries and specialty shops in serviceable areas who want to serve the local digital-first customer base.
💡 Why Blinkit Over Other Platforms?
Blinkit commands 40%+ market share in Indian quick commerce — more than Zepto and Swiggy Instamart combined. Brands that onboard early capture category visibility and algorithm priority that late entrants miss. In quick commerce, being first in your category in a cluster means more impressions, more impulse buys, and stronger repeat purchase rates.
Who Can Sell on Blinkit? Eligibility Criteria
Blinkit follows a curated marketplace model — unlike Amazon or Flipkart, it does not allow every seller to list freely. Your business must meet specific eligibility requirements before your onboarding application is even reviewed.
| Eligibility Requirement |
Details |
Status |
| Valid GST Registration |
GSTIN is mandatory for all sellers on Blinkit without exception |
Mandatory |
| Business Registration |
Sole proprietorship, partnership, LLP or private limited company |
Mandatory |
| Blinkit Serviceable Category |
Products must fall under Blinkit’s 7,000+ eligible product categories |
Mandatory |
| Operational in Blinkit City |
Must be able to supply from within Blinkit’s active cluster zones |
Mandatory |
| FSSAI License |
Required for food, beverage, and nutrition products |
Food Sellers Only |
| Trademark Certificate |
Required if selling branded products to verify brand ownership |
Branded Products |
| Consistent Inventory Capacity |
Blinkit expects sellers to maintain stock without frequent OOS situations |
Mandatory |
Documents Required for Blinkit Seller Onboarding
Missing or incorrect documentation is the single biggest reason for Blinkit seller application rejections and delays. Prepare all of the following in clear, legible digital format (PDF or high-res JPG) before beginning the registration process:
📋
GST Certificate (GSTIN)
15-digit GSTIN is mandatory. Blinkit auto-fetches business details using this number. Ensure it is active and in your business name.
🪪
PAN Card
Business PAN linked to your registered entity. Individual PAN accepted for sole proprietors.
🏦
Bank Account Details
Active current account in your business name. Cancelled cheque or bank statement for verification.
🏢
Business Registration Proof
Udyam Registration, Company Incorporation Certificate (CIN), or Partnership Deed depending on your entity type.
™️
Trademark Certificate
Required for branded product sellers. If trademark is applied but not granted, the application acknowledgement is accepted.
🍱
FSSAI License
Mandatory for all food, beverage, dairy, and nutrition product sellers. Central or state FSSAI license accepted.
📸
Product Images & Catalogue
Clear, professional product photos (white background preferred), MRP, weight, barcode/UPC, and full product descriptions.
📍
APOB (GST Additional Place of Business)
You must add Blinkit’s dark store/warehouse as an Additional Place of Business on the GST portal before going live. This requires an ARN number.
⚠️ Critical: Blurry documents, names that don’t match across documents, or an inactive GST number are the top causes of rejection. Double-check all documents before submission. A single mismatch can delay your onboarding by 15–30 days.
Blinkit Seller Onboarding Process — Step by Step
The Blinkit seller onboarding process has 7 distinct stages. Unlike Amazon or Flipkart where you can self-serve most steps, Blinkit requires interaction with a Category Manager and strict compliance at every stage. Here is the complete process:
1
Register on the Blinkit Seller Hub
Visit the official Blinkit Seller Hub and select “Sell on Blinkit.” Enter your email ID and verify via OTP. This creates your seller login. Next, fill in your business details — selling category, online platform, name, designation, and mobile number. Verify your mobile via OTP and click “Save & Continue.”
🔗 Use a dedicated business email — not a personal Gmail — for your Blinkit seller account.
2
GST Verification
Enter your 15-digit GSTIN. Blinkit automatically fetches your business information from the GST database. Click “Verify” to confirm. If your GSTIN is not yet registered or has discrepancies, resolve these before proceeding — you cannot advance without a verified GST number.
⚠️ Ensure your GST registration shows the correct business address. Address mismatches cause verification failures.
3
Brand & Business Details Submission
Submit your brand name, description, and all business-related information. Upload your trademark certificate (or application), FSSAI license (if applicable), business registration proof, and PAN card. Provide your business bank account details for payment settlements.
📁 Use PDF format for all documents. Ensure all names match exactly with your GST registration.
4
Category Manager Assignment & Review
Unlike Amazon or Flipkart, you cannot directly list products on Blinkit. A Category Manager (CM) is assigned to your account after initial application review. This CM reviews your product portfolio, brand credibility, and category fit. Without CM approval, you cannot go live — this is a non-negotiable step that many sellers underestimate.
🎯 Having a clear brand deck, strong product images, and defined USPs significantly speeds up CM approval.
5
Product Listing & SKU Upload
Work with your CM to upload product listings. Each SKU requires: brand name, product name, UPC/barcode, category, pricing details, MRP, images and videos, weight, dimensions, and ingredients (for food products). Photos must be professional and comply with Blinkit’s seller guidelines. Blinkit takes 3–7 days to approve SKUs after submission.
📸 White background product images with 1000×1000px minimum resolution have the highest approval rate.
6
PLA Payment (for SOR Model Sellers)
Under the Sale or Return (SOR) model, Blinkit charges a Product Listing Advertisement (PLA) fee of ₹25,000 per SKU per cluster. This is a mandatory upfront payment that Blinkit returns as ₹25,000 ad credit to be spent on in-app advertising. This step applies primarily to branded FMCG sellers using the SOR model.
💡 Plan your SKU selection carefully — each cluster requires a separate PLA payment. Start with 1–2 high-velocity SKUs.
7
APOB Setup on GST Portal + First PO & Go Live
Before going live, you must add Blinkit’s warehouse address as an Additional Place of Business (APOB) on the GST portal. This generates an ARN number that must be submitted to Blinkit. Once APOB is verified, Blinkit generates your first Purchase Order (PO). Dispatch as per the PO, and your products are live in the dark store — ready for 10-minute delivery.
🏛️ APOB setup on the GST portal takes 7–15 working days. Start this simultaneously with other onboarding steps to save time.
Blinkit Seller Approval Timeline — What to Expect
Day 1–3
Initial Registration & GST Verification
Account creation, email/mobile OTP verification, and GST number verification. Fast if all details are accurate.
Day 3–10
Document Review & Category Manager Assignment
Blinkit’s internal team reviews your documents. A Category Manager is assigned. Follow-up emails may be sent for additional information.
Day 10–20
Product Listing Upload & SKU Approval
Work with your CM to upload product listings. Each SKU goes through a 3–7 day review. Rejections extend this timeline.
Day 15–35
APOB Setup on GST Portal
This runs in parallel and typically takes 7–15 working days on the GST portal. The ARN is required before final approval.
Day 30–60
First PO Generation & Go Live
Once all verifications are complete, your first Purchase Order is raised. Dispatch per PO instructions and your products go live on Blinkit.
⚡ How to Go Live Faster
Sellers who prepare all documents in advance, work with an experienced Blinkit onboarding agency, and have a strong brand deck with professional product images consistently go live 20–30 days faster than those navigating the process solo. Brand Chanakya’s onboarding team has managed this process across multiple categories and can significantly reduce your approval timeline.
What Can You Sell on Blinkit? Top Categories
Blinkit operates across 7,000+ product categories but the highest-performing and most accepted categories are:
🛒
Grocery & Staples
Atta, rice, pulses, oils, spices — high velocity, consistent demand
🥤
Beverages & Drinks
Juices, energy drinks, packaged water, tea, coffee
🍫
Snacks & Packaged Food
Biscuits, chips, chocolates, instant noodles — impulse buy leaders
🧴
Personal Care
Shampoo, body wash, skincare, oral care — strong repeat purchase
🏠
Home & Cleaning
Detergents, dishwash, floor cleaners, air fresheners
💊
Health & Wellness
Vitamins, supplements, OTC medicines, health foods
👶
Baby & Mother Care
Diapers, baby food, wipes — urgent need, high repeat
🐾
Pet Care
Pet food, treats, and grooming products — fast-growing category
❌ Products You Cannot Sell on Blinkit: Alcohol (outside licensed states), tobacco products, prescription medicines without proper licensing, counterfeit or unbranded products, items requiring special import permits without documentation.
Blinkit Commission Structure — What Does It Cost to Sell?
| Cost Type |
Amount / Rate |
Applies To |
Notes |
| Seller Registration Fee |
₹0 (Free) |
All sellers |
No upfront registration cost on Blinkit |
| Commission Per Sale |
8% – 20% |
All models |
Varies by category and negotiation with CM |
| PLA Charges (SOR Model) |
₹25,000 per SKU per cluster |
SOR sellers |
Returned as ad credit — must be spent on Blinkit ads |
| Payment Settlement (SOR) |
7–14 days post-delivery |
SOR model |
After deducting commission and applicable fees |
| Payment Settlement (OR) |
As per PO terms |
OR model |
Defined in the purchase order agreement |
| Promotional / Ad Charges |
Variable |
Optional |
In-app advertising to boost visibility and ranking |
Common Reasons Blinkit Seller Applications Get Rejected
Understanding why applications fail is as important as knowing how to apply. These are the most frequent rejection triggers:
✗Mismatched business names across GST certificate, PAN card, and bank account — all three must reflect identical entity names.
✗Blurry or low-resolution documents — Blinkit’s verification team rejects documents that are not clearly readable.
✗Inactive GSTIN — an expired or suspended GST registration leads to immediate rejection regardless of other documents.
✗Missing FSSAI license for food product sellers — this is non-negotiable and cannot be substituted with any other document.
✗Product listing non-compliance — incorrect barcodes, missing MRP, poor quality images, or incomplete product descriptions.
✗APOB not completed before going live — sellers who skip or delay the APOB GST portal step face last-minute delays after all other approvals are in place.
✗Category mismatch — applying to sell in a category Blinkit does not currently support in your city cluster leads to automatic rejection.
SOR vs OR Model — Which Selling Model is Right for You?
| Feature |
SOR Model (Sale or Return) |
OR Model (Outright Purchase) |
| How It Works |
Blinkit stocks your products in dark stores; unsold stock can be returned |
Blinkit purchases stock from you outright via PO |
| Upfront Cost |
PLA fee of ₹25,000 per SKU per cluster (returned as ad credit) |
No upfront listing fee |
| Inventory Risk |
Lower — unsold stock is returned to you |
Higher — Blinkit owns the inventory post-PO |
| Who It’s Best For |
New brands, D2C companies entering quick commerce for the first time |
Established FMCG brands with proven high-velocity SKUs |
| Payment Terms |
7–14 days post-delivery of orders |
As defined in the Purchase Order |
| Pricing Control |
Higher — you set MRP and selling price |
Lower — Blinkit may discount post-purchase |
“Blinkit is not just another marketplace. It’s an on-demand shelf — and like any prime shelf space, the brands that prepare best, move fastest.”
Why Hire a Blinkit Onboarding Agency?
The Blinkit seller onboarding process has multiple technical, compliance, and coordination touchpoints that are easy to get wrong — especially for brands doing it for the first time. Here is why experienced sellers and D2C founders choose to work with a professional Blinkit onboarding agency like Brand Chanakya:
✓Faster go-live: An experienced agency knows exactly what Blinkit’s Category Managers look for, reducing back-and-forth and cutting approval time by 2–3 weeks on average.
✓Zero-rejection document preparation: Every document is checked for name matches, format compliance, and completeness before submission — eliminating the #1 cause of delays.
✓APOB setup managed end-to-end: The GST portal APOB process is handled by our team so you don’t have to navigate government portals while running your business.
✓Product listing optimisation: Professional product titles, descriptions, and images that comply with Blinkit guidelines and rank higher in category search results.
✓Category Manager coordination: Direct follow-up with your assigned CM to keep approvals moving — a task that routinely stalls for self-managing sellers.
✓Post-live account management: Inventory monitoring, reorder alerts, in-app advertising management, and sales performance reporting — so you grow after going live, not just get listed.
Frequently Asked Questions — Blinkit Seller Onboarding
QHow long does the Blinkit seller onboarding process take?
The complete Blinkit seller onboarding process typically takes 30–60 working days (excluding weekends and holidays). The timeline depends on how quickly your documents are verified, how responsive your Category Manager is, and how fast the APOB setup is completed on the GST portal. Working with an onboarding agency can reduce this timeline by 15–25 days.
QIs GST registration mandatory for Blinkit seller onboarding in India?
Yes, absolutely. A valid and active GSTIN is mandatory for all sellers on Blinkit without exception. Blinkit uses your GSTIN to auto-fetch business information and for invoicing and tax compliance. If you don’t have a GST registration, you must obtain one before beginning the onboarding process.
QWhat is APOB and why is it required for Blinkit?
APOB stands for Additional Place of Business. Since your products will be stored at Blinkit’s dark store/warehouse, that warehouse address must be registered as an Additional Place of Business under your GST account. This is mandatory from a tax compliance perspective. You need to apply on the GST portal, receive an ARN (Application Reference Number), and share it with Blinkit before your account can go live.
QWhat are Blinkit’s PLA charges and are they refundable?
Blinkit PLA (Product Listing Advertisement) charges are ₹25,000 per SKU per cluster under the SOR model. This is a mandatory upfront payment. However, Blinkit returns this amount as ₹25,000 in advertising credit which must be spent on in-app Blinkit advertising. So it is not a loss — it is a forced advertising investment that drives visibility for your products.
QCan my Blinkit seller application be rejected after submission?
Yes. Blinkit can reject applications for document mismatches, non-compliant product listings, missing licenses, or if your product category is not currently supported in the requested cluster. Most rejections can be resolved by correcting the specific issue and resubmitting. However, this adds 2–4 weeks to your timeline — which is why document preparation matters significantly.
QDoes Brand Chanakya offer Blinkit onboarding and account management services?
Yes. Brand Chanakya provides end-to-end Blinkit seller onboarding support — from document preparation and GST APOB setup to Category Manager coordination, product listing, and post-live account management. We also offer ongoing Blinkit account management services including inventory tracking, in-app advertising, and sales performance optimisation.
Ready to Start Your Blinkit Seller Onboarding?
The quick commerce opportunity on Blinkit is real, growing at 73% CAGR, and available to brands that act now. But the onboarding process is structured, document-heavy, and unforgiving of errors. Every week of delay is a week your category competitors are selling — and building algorithm priority — while you wait.
Whether you want to navigate the process yourself using this guide, or you want Brand Chanakya’s team to handle every step for you — the most important thing is to start today.
✅ Key Takeaways
✔ Blinkit holds 40%+ of India’s quick commerce market — the #1 platform to be on
✔ Onboarding requires GST, PAN, business proof, FSSAI (food), trademark, and APOB setup
✔ The full process takes 30–60 days — document accuracy is the biggest time-saver
✔ A Category Manager must approve your products before you can go live
✔ SOR model suits new brands; OR model suits established FMCG with proven SKUs
✔ PLA charges of ₹25,000/SKU/cluster are returned as ad credit under the SOR model
✔ An experienced onboarding agency can cut go-live time by 2–3 weeks and eliminate rejections
 Special Offer - Flat 18% off on annual payments!